
I read the specs on the Nexus 5 as I order it and my thoughts as always go to, "What accessories can I buy/make to make all this cooler?" Then I see the wireless charging. "Sweet I want a Qi car dock so I can just slap it in there and go..." I tell myself, only to find the options are either crappy Chinese made docks that look like crud or $200+ options that aren't all that great either.
At this point my, "They don't make it... Fine I WILL!" mentality takes over and I start digging thru options of Qi charging pads. Reading tons of reviews, digging thru spec sheets, taking measurements, etc. I settle on the Nokia DT-900 charger. It has great review, is the right size, runs on 12 volts, and looks great. The only problem is it retails for north of $40 bucks most places, but oddly enough AT&T has them on sale all the time for $24, and when I ordered them they had 25% off if you ordered 3 or more accessories. So I ended up getting them for $18 a piece. about $55 for all 3 shipped. just a tad more than one other places.
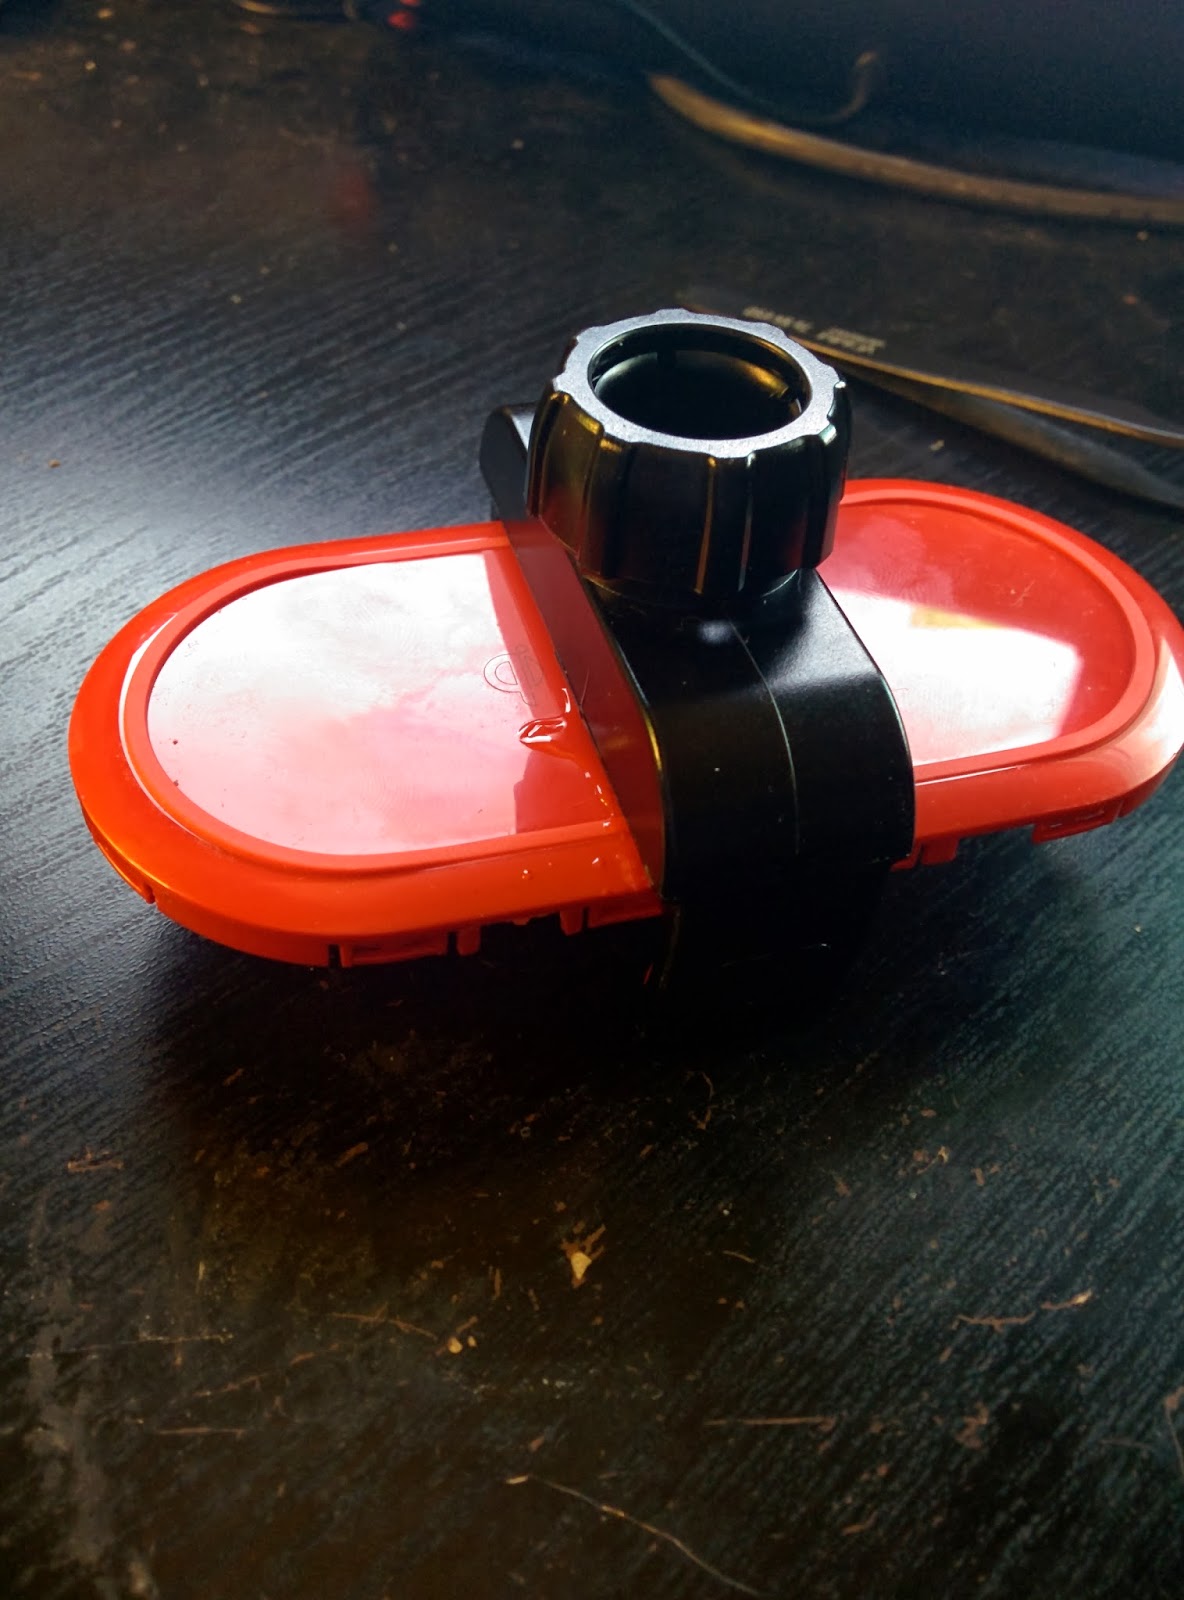
Then I turned my attention to the cradle it's self. I needed something universal, strong, and that would fit with phone and charger. I found the Aduro U-GRIP Plus from Amazon for $20 It had good reviews, everything would fit, and looked the part too.
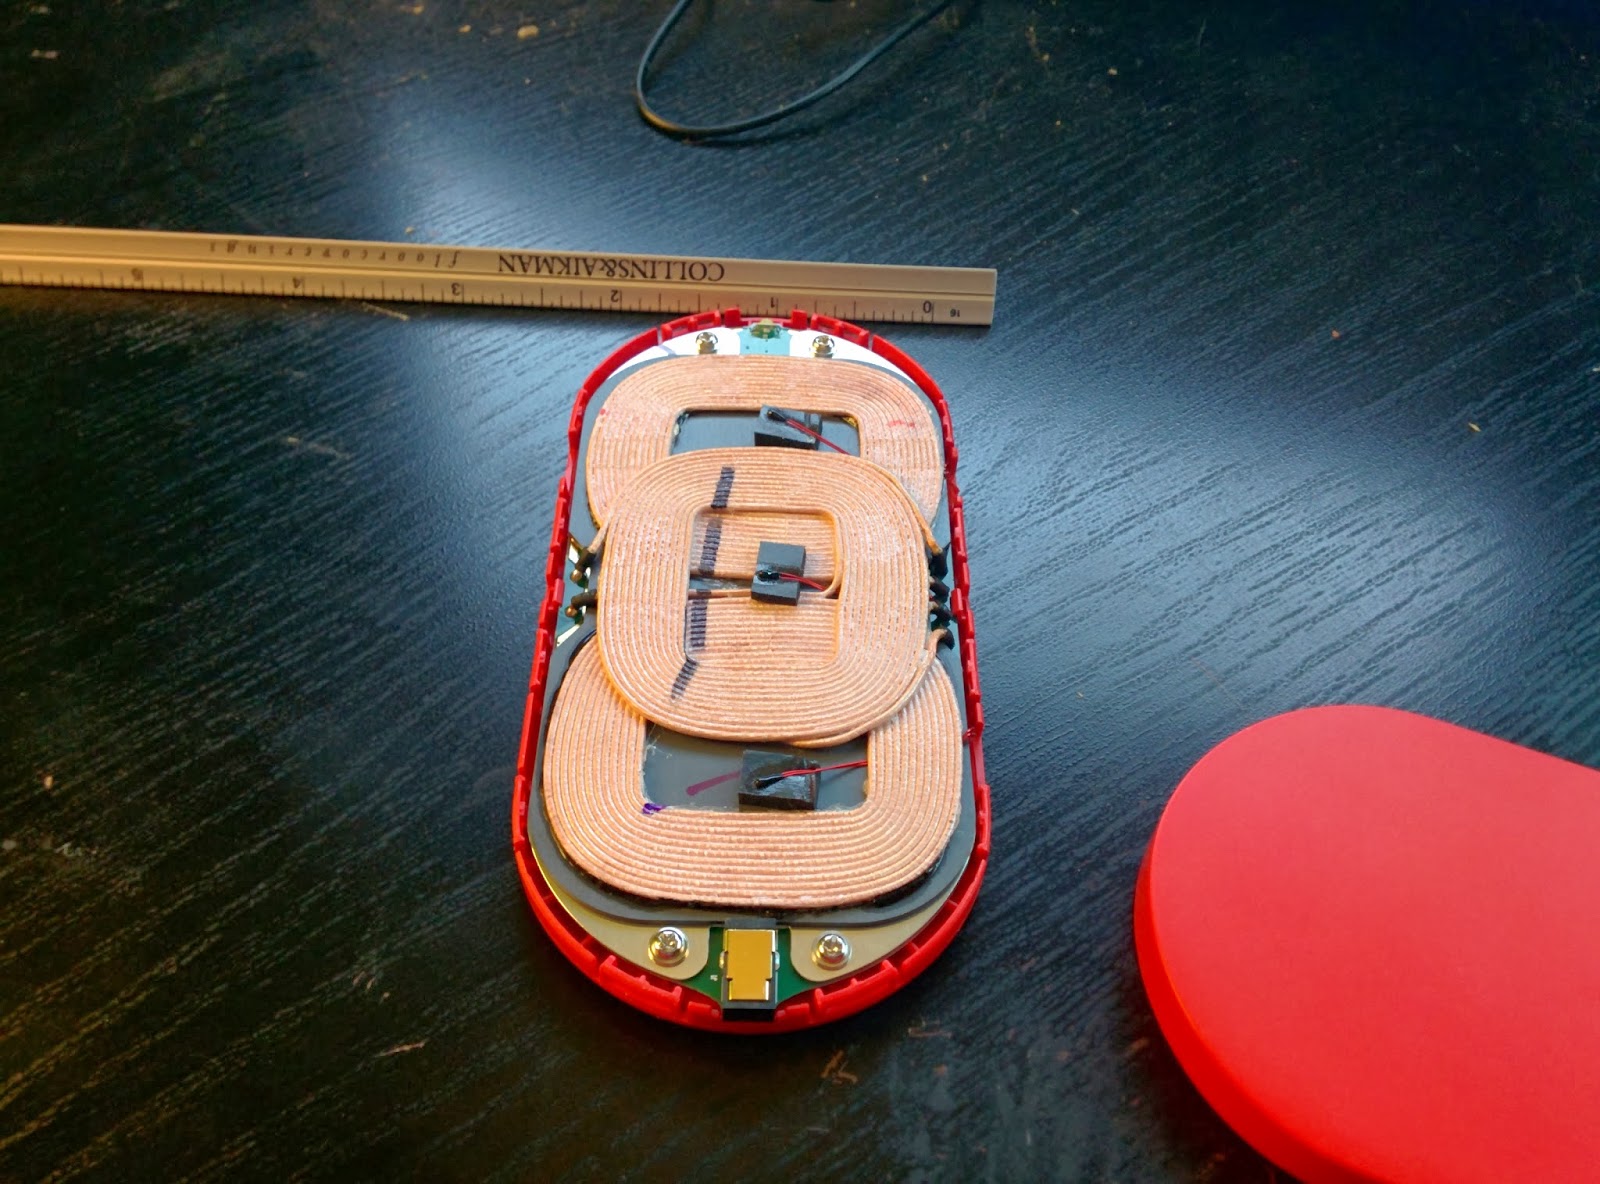
Here are some good shots of the charger torn down. You can see it has 3 pads so it is pretty much one big charger. It's hard to miss the "sweet spot" on it when it is ALL CHARGER. lol


I pulled the gripping pads out of the cradle so I could Epoxy the charger in place on just one of the expanding arms. This gave me an extra 2mm for the phone to fit in the arms a bit better as well.


I wanted to wire it directly to the car and went over board on this part based on some other long term projects in my WRX. I brought a new power cable into the cabin directly from the battery (30amp fused at the battery) then wired it to a brand new fuse block so I can wire multiple things off this new run and not have to "Tap into" other circuits. I did tap into the ACC line so I could use a relay to make the fuse box only live when the car is on. so any of the things I wire off it won't drain the battery. I'm sorry i don't have any pics of this setup but I will work on writing that part up in another post soon.
Also one thing to note here is that the power you get from your car is NOT very "clean". While running the alternator is pumping out 13-15 volts. Second there are massive spikes from different parts turning on and off and relays that are not protected by diodes so 50-80volt spikes are not uncommon. So this should be considered or any bit of electronics wired directly to the car's "+12v" supply will not be long for this world. For the charger (and my radar detector) I built a power supply to keep it below 12v and handle the spikes.
I had some Sharp PQ12RD21's Voltage regulators sitting around so I used those along with a simple TVS circuit to handle spikes above 18 volts. (no I don't have a digital version of the schematic I will get a picture of my notebook soon) For those out there that power supply design isn't in your ball park I'd go get something simple like these maybe these Ebay 3A DC-DC Buck converters with an LM2596S These have a low drop out aswell so that when the car is in ACC and not running ever just the battery at 12ish volts would still put out around 11.5 (I'm guessing here based on the datasheet for the LM2596S) and with my setup 11.5 is still enough to power the Qi pad.
I did some testing with the pad to see what it's current draw was. I ran some tests, a full charge from 0% to 100% This took about 3 hours (about 20% long then a normal full A/C wall charger) Then another test with the phone at around 50% running GPS and Streaming Netflix over LTE. This netted a decrease in battery of about 8% over 4 hours, so that is pretty good in my book. On a recent road trip I kept switching from Torque to Waze and I ended up still charging from 60% to 100% with the screen on for the whole 6 hours, Not sure how long it took but I ended the trip with a phone at 100% :D
 |
| With no phone the DT-900 draws about 4mA on it's on and about 30mA once I added the power supply circuit |
 |
| While charging it draws about 700mA when the battery is low and tapers down as the phone approaches 100% Here it is around 80% and drawing about half an Amp. |
 |
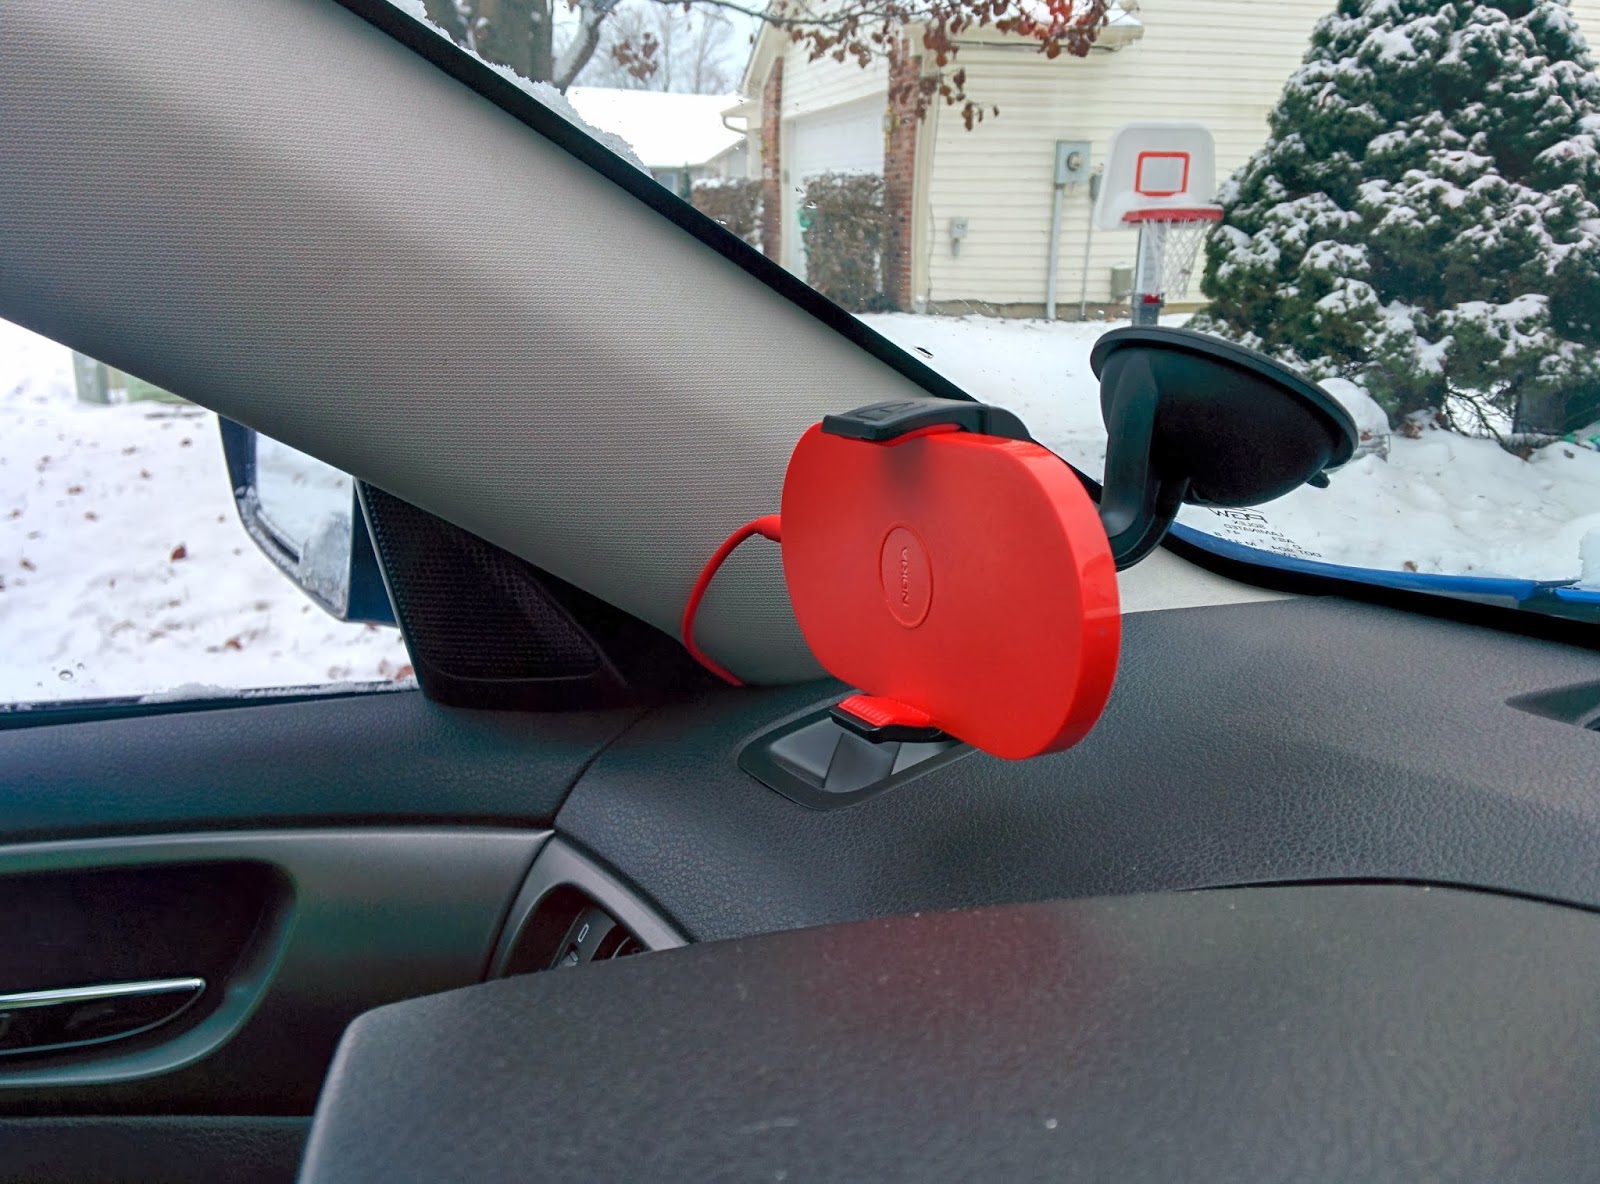
| The phone is a bit offset since the charger is attached to the lower arm but it still meets up with the charging pads very well. |


I just assumed this power cord was 2.5mm 12v to USB, but after looking (and after already buying) -- I think its 2.5mm to 2.5mm. Thinking about getting a 2.5MM to USB and connecting them... Think it will work?
ReplyDeleteNot at all. The connector is tiny! The pause diameter is 0.7mm also USB is 5v so there would be no way to power this as it takes 12v
DeleteThe outside*diameter
DeleteThanks for the update! I was looking on how to contact you, and didn't know if you'd actually respond to the comments!
DeleteLooks like I'll just use the Nokia charger at work and then use my existing Qi pad, which is powered by Micro USB, to pull off this mod. I want to run the power wire back through my center console and plug it into my Bluetooth Audio Receiver (Audio), which is plugged into the cigarette lighter between (and behind) my front seats.
I looked at the width of each of these devices (Nokia and the one that I've already got), and it looks like the one I have is a bit less wide, so I think I will be able to do almost the exact same modifications with my existing pad.
At any rate - great work! This DIY is killer, and anyone who has a bit of know how can pull it off and save themselves some dough. My last question is as follows -- It looks like you pulled off the rubber grippers on the arms of the mount, and then cut them in half and replaced the grippers only on the part that holds the phone. Is that correct? Did you epoxy the half-grip back onto the arm that touches the phone? Or did they just snap right back in? Just curious -- I'm sure I'll figure it out once the mount arrives on Tuesday.
Thanks again!
Brian
The red grippy parts have a sticky tape on the back side of them. So I cut out the parts that would touch the back of the charger so it would sit in the arms deeper. I also cut the side it that I epoxied the charger to so I'd have more epoxy to arm contact.
DeleteThis comment has been removed by the author.
ReplyDeleteWhat power is required for the charger? Can I cut off the wall plug transformer - and wire the charger instead to a standard cigarette lighter plug?
ReplyDeleteI cover that above, this one is 12 volts but others are 5. Just shop around
DeleteIn now days wireless charger like as a set of our life, without it traveling is more hard becasue our phone is important communication part of when travel correct?
ReplyDeleteI also have wireless charger for my nexus phone and bought from choe wireless shop just in £19.99 and you can also get reviews of choe product.
http://www.amazon.co.uk/dp/B00C40OG22
I like the way of choe works thanks.
Hi
ReplyDeleteAny chance to get Your home made power supply schematic ? I have trouble with powering the official nexus wireless charger in my car
Cheers
Fred
Hmmmm I did forget to post that. Monday when I'm back in my office I'll see what I can drum up for you but you should look into just getting one of these, http://m.ebay.com/itm/110953875290?nav=VA
Deleteunless you have a lot of parts on hand there's no way you could make one cheaper.
Thanks for your prompt answer.
ReplyDeleteI found this jind of device : http://www.aliexpress.com/item/USB-Power-Adapter-DC-DC-BUCK-Converter-Regulator-4-5-40V-12V-to-5V-2A-USB/1836601816.html
is it worth it or your link is enough for my project (5V 1.8A needed) ?
I've got a poor electronic background knowledge.
Cheers,
Fred
The charger never seemed to draw more than 700 ma so either should work
ReplyDeleteThen I see the wireless charging. "Sweet I want a Qi car dock so I can just slap it in there and go... wwirelesscharger.blogspot.com
ReplyDeleteThe Smartphone Experts Micro-USB Car Charger with USB Port is a mouthful of a name, but it filled a need I didn't even know I had. The Car Charger is your basic unit that plugs into the car's power adapter - sometimes called the cigarette lighter. It even glows blue when plugged in. The other end attaches to any device with a micro-USB port. This includes the BlackBerry PlayBook, Torch, and Bold devices to name a few. In addition to the charger plug, you also have access to one additional USB port to charge many, many other devices. Just the other day, I found both my BlackBerry and Bluetooth headset in desperate need of charging. I grabbed the tiny USB charging cable that came with the headset and my BlackBerry and headed out the door. After about an hour in the car, both were good to go
ReplyDeleteGet the universal Usb Car Charger from various range of Car chargers from Dockchargers.com best charger manufacturer of China
ReplyDelete
ReplyDeleteQi Wireless Charger
He Charging Rate is fine, the phone and pad stay Cool, and with overnight charging by morning you're at 100% ready to go. The Wireless Charging Pad is tailor-made for on-the-go fast charging. The Base is solid, non-slip plastic with a secure pad for your device. | eBay!
to get more - https://www.ebay.com/itm/253781119580
Great idea and very informative blog
ReplyDeleteChina wireless charger
I like this post, And I figure that they have a great time to peruse this post, they might take a decent site to make information, thanks for sharing it to me
ReplyDeletebest car charger usb
For true fans of this thread I will address is a free online! Cargo Liners
ReplyDeleteThanks for sharing nice information about Qi wireless dock charger with us. i glad to read this post.
ReplyDeleteThanks for ones marvelous posting! I really enjoyed reading it, you might be a great author.
ReplyDeleteI will be sure to bookmark your blog and will eventually come back later on.
Try to check my webpage - 부산오피
(jk)
The MagSafe Wireless chargers from KerfCase offer a sleek, stylish solution that aligns perfectly with modern aesthetics. Crafted from premium wood, they not only enhance the look of any space but also provide efficient, clutter-free charging. Their compatibility with various devices and the natural elegance they bring make them a top choice for those looking to combine technology with fashion. Check out the MagSafe stand collection.
ReplyDelete